Hardiebacker boards are a great helper in any tile work and provide a solid foundation for every project you do.
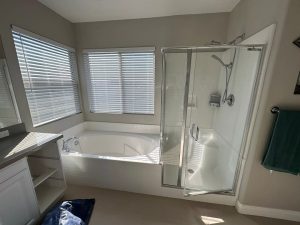
The board’s purpose is to create a surface that you place on the tile. The surface is flat and level; care for uneven walls or floors. Because it is cement, it is not resistant to mold, rot, and moisture damage, which means it is the perfect base for showers, kitchens, and bathrooms.
So how can you install these boards? We’ll see!
Application of the Hardiebacker board
The pad is supplied in panels and is made of cement – so it is heavy. Always check the weight before using the top plate.
There is a point at which you should be cutting the board because there is no wall that is the right size. Thus, obstacles such as pipes and electricity need to be considered.
The best methods are backplate shears (a tool designed for this job) or a jigsaw with a rough wooden blade or a utility knife, as shown below. Scissors seem to be the best tool for this job – but buying them can be expensive (although renting is an option).
The Jigsaw method works – gradually remove the saw from the board and think that you are damaging the blade.
Using the Stanley Auxiliary Knife / Knife to line the line will work, and you will have to click the line plate – always click for a clean rest
Use Hardie Backer Boards on walls and floors
Before installing the Hardiebacker backplates, ensure that the surface structure is in good condition – otherwise, eliminate all previously damaged and unstable risks.
The board can be nailed (nails the base plate) or screwed to the wall/floor. Always tie the boards with a brick to prevent corners from penetrating and creating a weak spot in the wall. If you use floorboards – first use a thin-set to keep the board safe, then nail/screw.
Apply alkali-resistant fiber tape to the joints with the wall and floor to increase safety and prevent the boards from slipping and sliding over time.
Rules that must be observed when lying on cement boards
Keep the following rules in mind when deciding on the layout of your HardieBacker cement boards:
- Keep a space ⅛ ”between the sides of the board
- Hide the sides of the sheet “back from the walls and foundations of the cabinet
- Lay the joints of the cement board in the bricklaying pattern
- Do not level the substrate joints
- Never align the four corners of the boards at one point
What to do after adding tiles to the HardieBacker board?
- Wipe the entire surface of the HardieBacker cement board by using a damp sponge.
- Spread the entire modified thin-set with the help ofa notched trowel which is suitable for the size of the tile you are finally installing.
- You have to comb the ridges in only one direction for great results.
- Rotate or push on the tiles.
- Allow at least 24 hours to cure for grouting.
Conclusion
Hardiebacker Boards are for internal use only. Their purpose is to give the wooden wall a cement base – for more excellent structure and strength. It is waterproof and suitable for damp rooms and bathrooms
Therefore, they are suitable for underfloor heating. Baseboards can be paints, plaster, and wallpaper!